Welcome to Part 3 of the series Create WordPress theme from scratch. In this tutorial, we will create the most basic WordPress theme possible.
If you missed the Part 2 of this series, then check it out at the link below.
Create WordPress theme from scratch – Part 2 – The Template Hierarchy
Before you start
Let me repeat what I said in the first part of the series. You will need to be familiar with basic PHP, HTML, CSS and Javascript. You also need a local development environment and a local WordPress installation.
The most basic WordPress theme
The most basic WordPress theme needs a minimum of two files. A styles.css file which stores the theme information and index.php file which is the ultimate fallback template file.
Create a new directory called mytheme for your theme in the WordPress themes directory located inside wp-content. Inside the newly created directory, create a file called style.css and place the following code at the top.
/*
Theme Name:     MyTheme
Theme URI:      The URI where this theme can be found
Author:         layerpoint
Author URI:     https://www.layerpoint.com/
Description:    A WordPress theme from scratch
version:        1.0
License:        GNU General Public License v2 or later
License URI:    http://www.gnu.org/licenses/gpl-2.0.html
Tags:           translation-ready
Text Domain:    mytheme
*/
The only line that you need is the first one which defines the name of the theme. All the rest are optional. The above is standard information that you will often find in a typical style.css file.
Here’s what they represent
Theme Name – Name of the theme.
Theme URI – Link to a page with information about the theme.
Author – Theme author name.
Author URI – Link to an author’s site which can be personal or projects site.
Description – A description of the theme. You can treat this like a teaser. You see this when you click Theme Details in the Dashboard themes page.
Version – The current version of the theme.
License – According to the WordPress handbook, themes need to be 100% GPL-licensed.
License URI – A permanent URL pointing to the full-text license.
Tags – a set of tags used by the official WordPress themes repository to sort and categorize themes. For example, here we are using translation-ready which specifies that all text visible on the frontend and the backend are translation ready. A complete list of valid tags is available here.
Text Domain – A text domain represents all text belonging to a plugin or a theme. This is a unique identifier. The text domain is used when creating and loading translatable text. It is best to keep this the same as the theme name. So, we are using mytheme.
For more information on the above visit this link.
Next, create a new file called index.php in your theme directory. That’s it, you have just created your very first WordPress theme. You can activate it right now from the Dashboard.
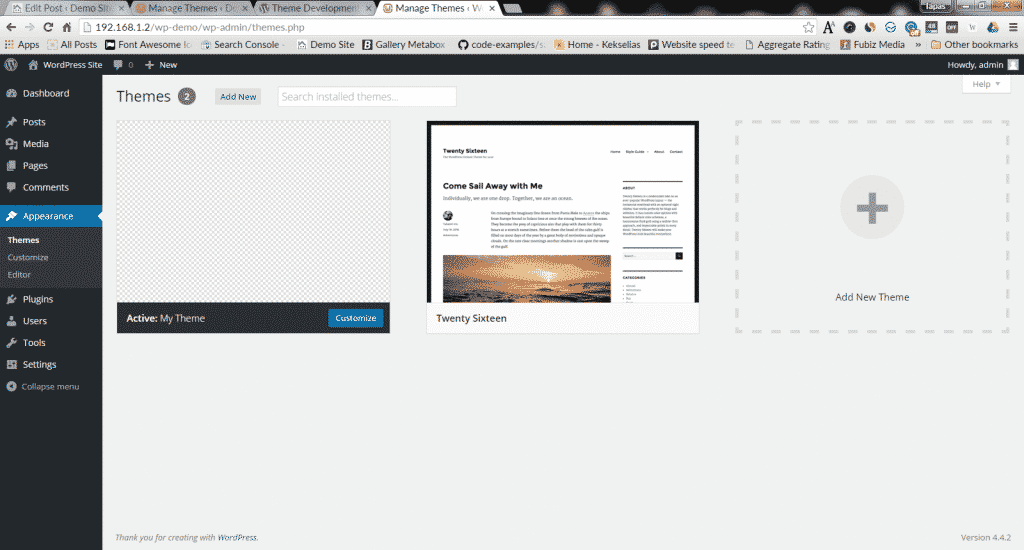
Go to Admin > Dashboard > Appearance > Themes

Notice that our theme does not include any preview. To add a preview, we need to place a preview image named screenshot.png in our theme directory. The recommended format for the preview image is png but jpeg and gif are also supported.
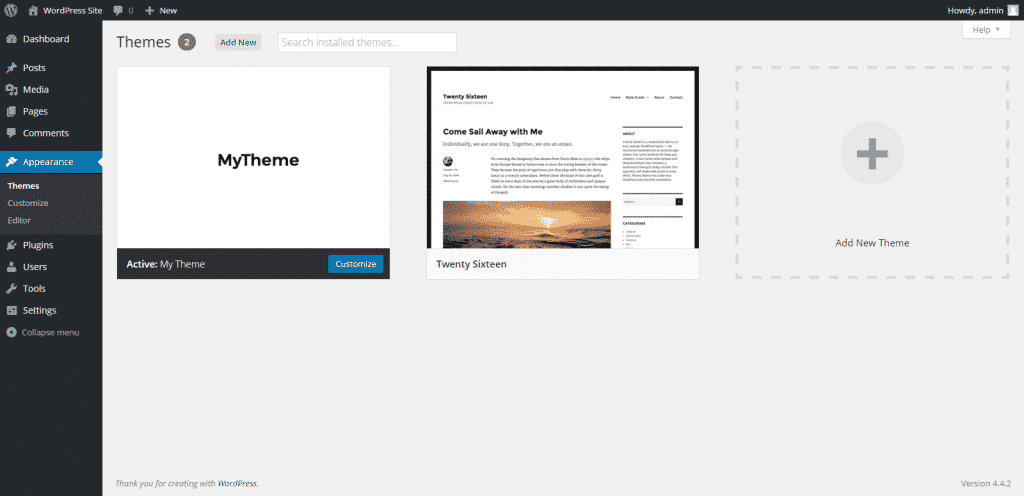
For best results, WordPress recommends an image size of 1200×900. Go ahead and add a screenshot.png file. This is how it looks now

Our theme is blank and so it won’t do anything at this point. Let’s keep it that way.
Core WordPress CSS reset
Every WordPress theme needs to style some elements. Such elements include floated images, WordPress galleries, captions and some other.
Here is a generic reset that you can use in all your themes.
/*
WordPress core reset

Table of contents

1.0 - Alignments
2.0 - Accessibility
3.0 - Media
    3.1 - Captions
    3.2 - Galleries
4.0 - Content
    4.1 - Posts and pages
    4.2 - Asides
    4.3 - Comments
*/

/*
Alignments
*/

.alignleft {
    float: left;
    margin: 0.375em 1.75em 1.75em 0;
}

.alignright {
    float: right;
    margin: 0.375em 0 1.75em 1.75em;
}

.aligncenter {
    display: block;
    margin: 0 auto 1.75em;
    clear: both;
}

/*
2.0 - Accessibility
*/

/* Text meant only for screen readers */
.says,
.screen-reader-text {
    overflow: hidden;
    position: absolute !important;
    width: 1px;
    height: 1px;
    clip: rect(1px, 1px, 1px, 1px);
    /* many screen reader and browser combinations announce broken words as they would appear visually */
    word-wrap: normal !important;
}

/*
3.0 - Media
*/

/* Make sure images are scaled correctly. */
img {
    max-width: 100%;
    height: auto;
}

/* Make sure embeds and iframes fit their containers. */
embed,
iframe,
object,
video {
    max-width: 100%;
}

/*
3.1 - Captions
*/

.wp-caption {
    max-width: 100%;
    margin-bottom: 1.75em;
}

.wp-caption img[class*="wp-image-"] {
    display: block;
    margin: 0;
}

.wp-caption .wp-caption-text {
    margin: 0.8075em 0;
}

.wp-caption-text {
    text-align: center;
}

/*
3.2 - Galleries
*/

.gallery {
    margin: 0 -1.1666667% 1.75em;
}

.gallery-item {
    display: inline-block;
    width: 100%;
    max-width: 33.33%; /* gallery-columns-3 */
    padding: 0 1.1400652% 2.2801304%;
    text-align: center;
    vertical-align: top;
}

.gallery-columns-1 .gallery-item {
    max-width: 100%;
}

.gallery-columns-2 .gallery-item {
    max-width: 50%;
}

.gallery-columns-4 .gallery-item {
    max-width: 25%;
}

.gallery-columns-5 .gallery-item {
    max-width: 20%;
}

.gallery-columns-6 .gallery-item {
    max-width: 16.66%;
}

.gallery-columns-7 .gallery-item {
    max-width: 14.28%;
}

.gallery-columns-8 .gallery-item {
    max-width: 12.5%;
}

.gallery-columns-9 .gallery-item {
    max-width: 11.11%;
}

.gallery-icon img {
    margin: 0 auto;
}

.gallery-caption {
    display: block;
}

.gallery-columns-6 .gallery-caption,
.gallery-columns-7 .gallery-caption,
.gallery-columns-8 .gallery-caption,
.gallery-columns-9 .gallery-caption {
    display: none;
}

/*
4.0 - Content
*/

/*
4.1 - Posts and pages
*/

.sticky {
    display: block;
}

.updated:not(.published) {
    display: none;
}

/*
4.2 - Asides
*/

.blog .format-aside .entry-title,
.archive .format-aside .entry-title {
    display: none;
}

/*
4.3 - Comments
*/

.bypostauthor {
    display: block;
}
Most of the above code is from twentysixteen and _s. Paste it in the style.css file.
Conclusion
This concludes the third part of the series Create WordPress theme from scratch. In the next part of the series, we will create functions.php template file and set up our theme features.


